|
 |
This install takes 10 - 20 minutes. The only thing to watch is that you do not damage the mass air flow sensor (expensive) otherwise this is rather simple. Also make sure nothing falls down the intake or it will end up inside your engine (not good).
Click on the images for larger views. |
Step 1: Getting the required items together
This install requires:
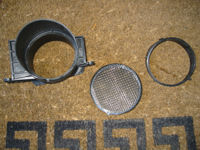
- 1 Ground Control Intake Screen (a.k.a. Gizmo)
- Flat Screwdriver
- Phillips Screwdriver
- A BMW M3 (E46).
- 10 - 20 minutes of free time.
|
 |
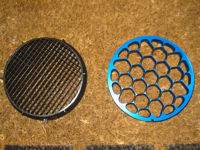
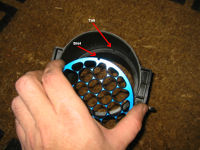
OEM & GC "Screens" |
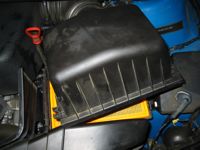
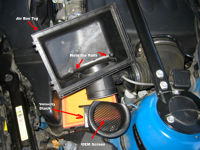
Step 2: Locate the Air Cleaner Housing and Loosen Intake Clamp
- Open the hood.
- Locate the air filter housing.
- Locate the silver hose clamp at the back of the air filter housing (see image)
- Loosen this clamp (by turning the bolt counter clockwise) as far as you can without taking it off completely.
|
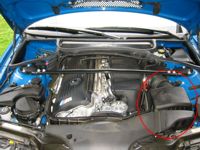
Location of Air Filter Housing
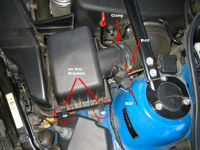
Clamp, Bolt, MAS, etc |
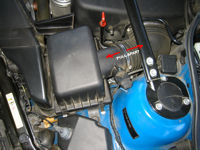
Step 3: Unlock Air Box Retaining Clips
- There are 2 silver clips located on the side of the air box facing the fender (see image).
- Unlock these by pushing them toward the fender.
|
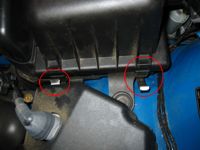
Hold Down Clips (one open, one closed) |
Step 4: Open the Air Box
- Once the retaining clips are unlocked lift that side of the housing up about an inch.
- The other side of the box is retained in place by a set of plastic tabs (see image).
- While lifting the clip side of the box, gently slide the upper portion of the box toward the fender.
- Once you have moved the upper part of the box far enough (3/4" or so) the tabs will release and allow you lift the upper part of the air box housing.
|

Rear Tabs
Upper portion of the Air Box Released |
Step 5: Removing Top Section of the Air Box
- Be careful when doing this! You don't want to damage the mass airflow sensor when taking the top of the air box off.
- Work the plastic upper section of the air box out of the hose attaching to the engine.
- Do this slowly and gently (see image) - remember that the mass airflow sensor is still attached.
|
Taking the Top Off
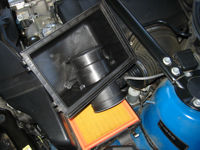
Top Removed |
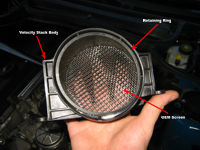
Step 6: Removing the Velocity Stack
- There are 2 screws that are used to retain the velocity stack (see image)
- Once the screws are out, the velocity stack will slide right up and out of the air box top.
|
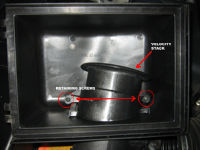
Velocity Stack In Air Box
Air Box Top With Velocity Stack Removed
Velocity Stack Removed |
Step 7: Removing the OEM Screen
- Once the velocity stack is out of the vehicle pull out the retaining ring from the back of the velocity stack.
- Push the OEM screen out of the velocity stack body and set aside.
|
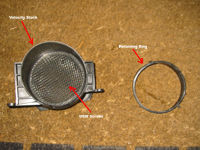
Retaining Ring Removed
OEM Screen Removed |
Step 8: Installing the GC Screen
- Note the tab on the inside of the velocity stack body and the slot on the edge of the GC screen - these need to line up (see image)
- The GC screen is reversible so there is no correct front or back side.
- Eye up the slot on the screen and the tab in the velocity stack and insert the screen - mine was pretty tight and required placing the screen in the velocity stack and working it in by alternating pushing at 9 and 3 o'clock and 12 and 6 o'clock positions until it was completely seated.
- Once the screen is lined up in the velocity stack it can also be pushed home with the retaining ring which also has tab that lines up with a recess in the velocity stack (see image)
|
Slot and Tab
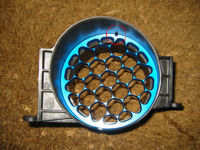
GC Screen Seated
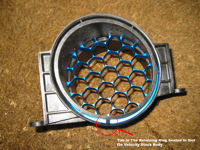
Retaining Ring Replaced |
Step 9: Reinstalling the Velocity Stack
- The velocity stack slides back into the air box top - there is only one way that it can fit.
- Replace the 2 retaining screws and snug them down (don't over do it).
|
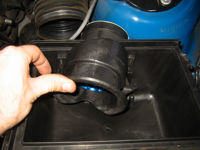
Sliding the Velocity Stack in Place |
Step 10: Reinstalling the Air Box Top
- There is a rubber gasket that fits over the end of the tube that connects the air box top to the intake. It may be still inside the intake - take a look and if it is still inside the intake pull it out and place it on the end of the tube.
- Slide the tube back into the intake, line up the clamp and tighten it back down.
|
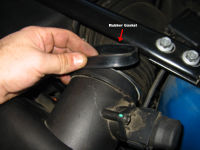
Rubber Gasket
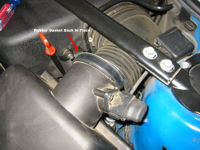
Rubber Gasket Seated |
Step 11: Closing Things Back Up
- Make sure the filter is still in place and then place the top of the air box over the filter and gently slide it sideways to fit the plastic tabs into the bottom of the housing.
- Once the tabs are in, check to see that filter is still seated properly and then close the box and snap the retaining clips back into place.
|
|

|